- ITソリューショントップ
-
製品・ソリューション
-
ダイキンのIT
 製造業向けITソリューション
 品質DX支援 QX digital solution
 建設業務改善ソリューション
 ビル管理業務支援 DK-CONNECT BM
 FILDER SiX TOP
 FILDER SiX 電気 TOP
 Rebro D TOP
 実験記録をデータベース化 ParsleyLab
 マテリアルサイエンス向けソフト Materials Studio
 熱力学物性予測ソフトウェア COSMO
 電子実験ノート
 総合3DCG 制作ソフトウェア Maya
 総合3DCG 制作ソフトウェア 3ds Max
 3Dキャラクタアニメーション制作ソフトウェア MotionBuilder
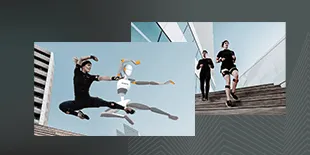 モーションキャプチャーシステム Xsens MVN
|
プロローグ ; Prologue
|
| 目; Eye ではまた、目からいきます。
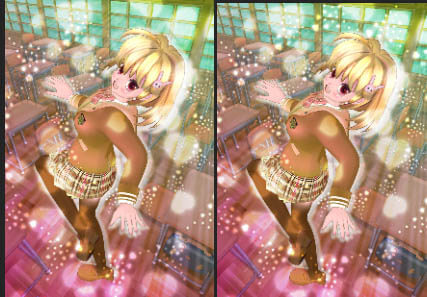
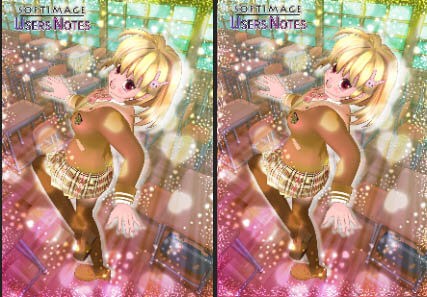
前回の時の3Dで作成したデータの改変です。イラスト風が目標だと、真ん中の黒い瞳部分をはっきりさせる方がそれらしい感じが出ました。 Let's begin from eye , again . It's a changed version from previous 3D scene . Talking about illustration look , the center of the eye is more likely sharp black . 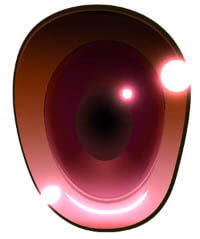 真ん中の黒い瞳部分も茶色系のGradientノードを使用します。タイプを 放射状の波 にすると円形のグラデーションになります。
後は少しピンク色系のGrowを乗せてハイライト効果とします。 The center of the eye is made from Dark brown Gradient node . Type is Radial Wave to get round gradient, set pink Grow as hightlight . 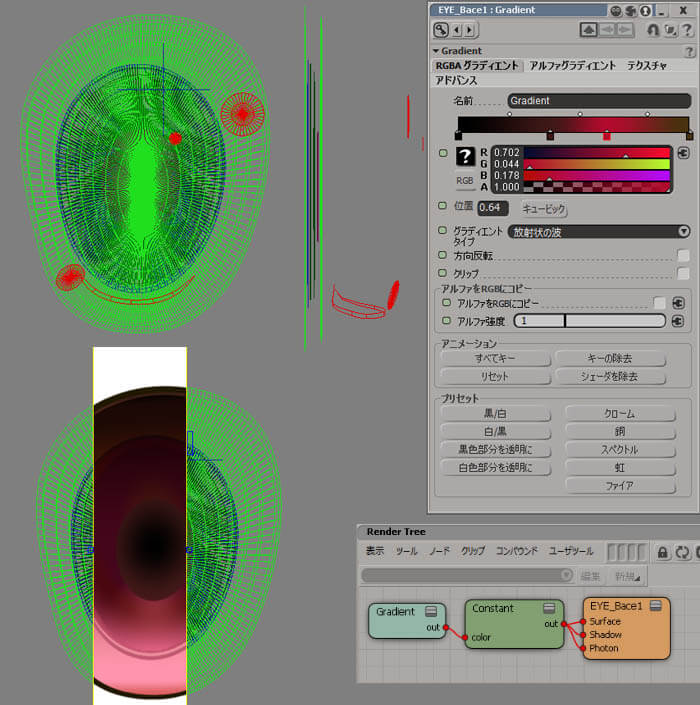 眼球ポリゴンにテクスチャーとして貼れば完成です。めっちゃ目に接近しても綺麗です。
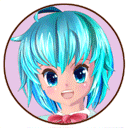
Render this and put as textures of eye polygon . It's looking good , even in a closest scene. 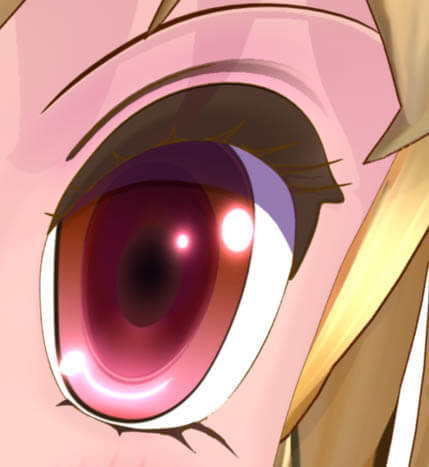 キャラ・イラストのような目を作ることができました。
あ、いい忘れましたが、ハイライトの関係で、左右は違う絵になります。 Got illustration like eye , and the eye texture is different side to side because of it's highlight .  |
| 髪の毛;Hairモデリング:Modeling 髪の毛も作り方は、また変えてみました。 今回は、最初のキャラのようなサブディビジョンサーフェイスを使うことを前提に、元ポリゴン数は抑えて作成しています。 あとはToonShaderの設定の方でイラスト風な見た目を得られるようにしたいと思います。 The modelling method of hair is change again . It's using Subdivision Surface like the first Character , and the number of polygon is reduced .  イラスト集の本、漫画、アニメの一シーンやその設定資料......今時は便利過ぎる程たくさんあります。 その中でも気に入った絵師さんの方向性を見出して自分が再現出来るであろう絵の雰囲気をつかみます。 (自分が再現できる方向性や自分が作り出せる個性を見出すことが重要です。) まずはポリゴン数を抑えたモデリング方法を取ることを頭に入れつつ、髪型を考えていきます。 カーブを使って3D的に位置決めをしていきます。 To know your goal , you reference many illustration . Books of drawings , Comics(Manga), Animation and it's settings . Also find the drawing method of your favorite illustrator . (To know your way to get close to the gaol or finding your personality is important ) Reminding the polygon amount has to be low , we start modeling her hair . Use curves to find the good place in 3D . 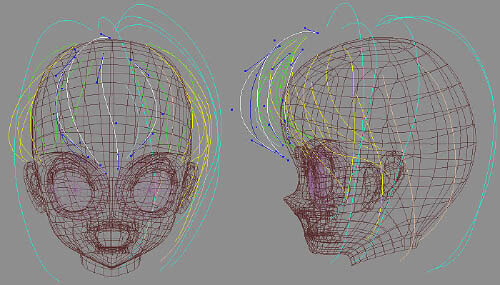 出来たNurbsの面がなるべく水平になるように位置調整した後、 作成 > ポリゴンメッシュ > NURBSからメッシュでポリゴン化します。 出来上がったポリゴン同士を作成 > ポリゴンメッシュ > マージで結合していきます。 In Model Module , select the first curve , then do Create > Surf.Mesh >Loft , and pick the second curve . Set the Nurbs edge square as possible , then Create > Poly.Mesh > Nurbs To Mesh and make it polygon . And Create > Poly.Mesh > Merge to get those polygons to one object . 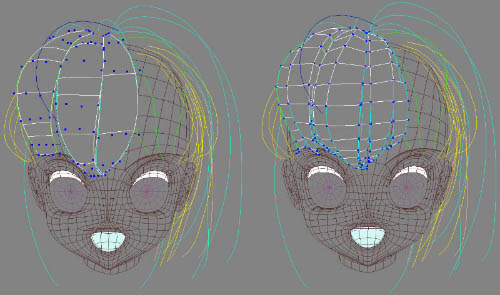 もちろん製作途中にて位置や形の修正は入って来ますが、とにかく360度から見の位置決めを行っていきます。 今回の立体的な処理で面白い所は、顔の左右に伸びている髪の毛が、頭上部では段差になっていて 前髪はその下に入り込んでいる造形でしょうか。 Keep going to all hairs . You also make some fixes , especialy looking around to get nice modelling. The nice modelling in this hair is the side hair goes up to top with making front hair underneath it . 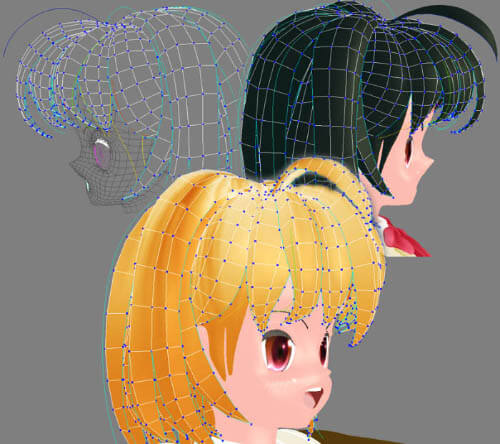 サブディビジョンサーフェイルを適応するには、 [ + ] キーを1回~2回押す程度でOKです。 Make slightly different from left to right . To subdivision surface , hit the [ + ] Key once or twice , that is enough. 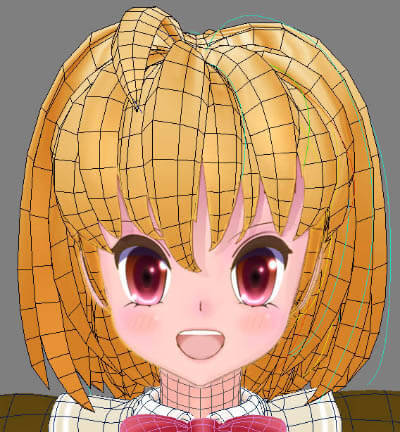 |
| 髪の毛;;Hairシェーディング:Shading モデリングの後は、シェーダー設定です。 特に今回は、イラスト的な表現を目指していますので、既存設定にどのような工夫をすればそのようになるかを考察しています。 After modeling is shading. Especialy this time , wanting an illustration like looking , you have to think what additional settings will make that extinguish . 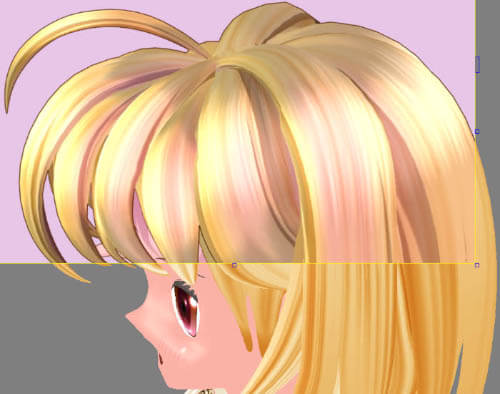 これを実現する為に、上と下に影の入るテクスチャーを加えることにしました。 そのことで、明るい天辺が暗くなり、明るい部分が”天使の輪”的に残るようにしました。 最終的には、以下のようなRenderTree構造になりました。 2段になっているのは、表と裏で別処理をしているからです。 特徴的な点を次に解説します。(なにせ項目が多いので、うまく伝われた良いのですが...) With more observation , specific place often on top of hair and end of it, has some shadow like dark places . To achive this looking , add a texture that makes some darkness in top and bottom . With this , the very top of hair come dark and around that will shine like a ring . The Render Tree ended up like this below . The upper part and below is front or back polygons . Some explanation will come next , hope for more understanding . 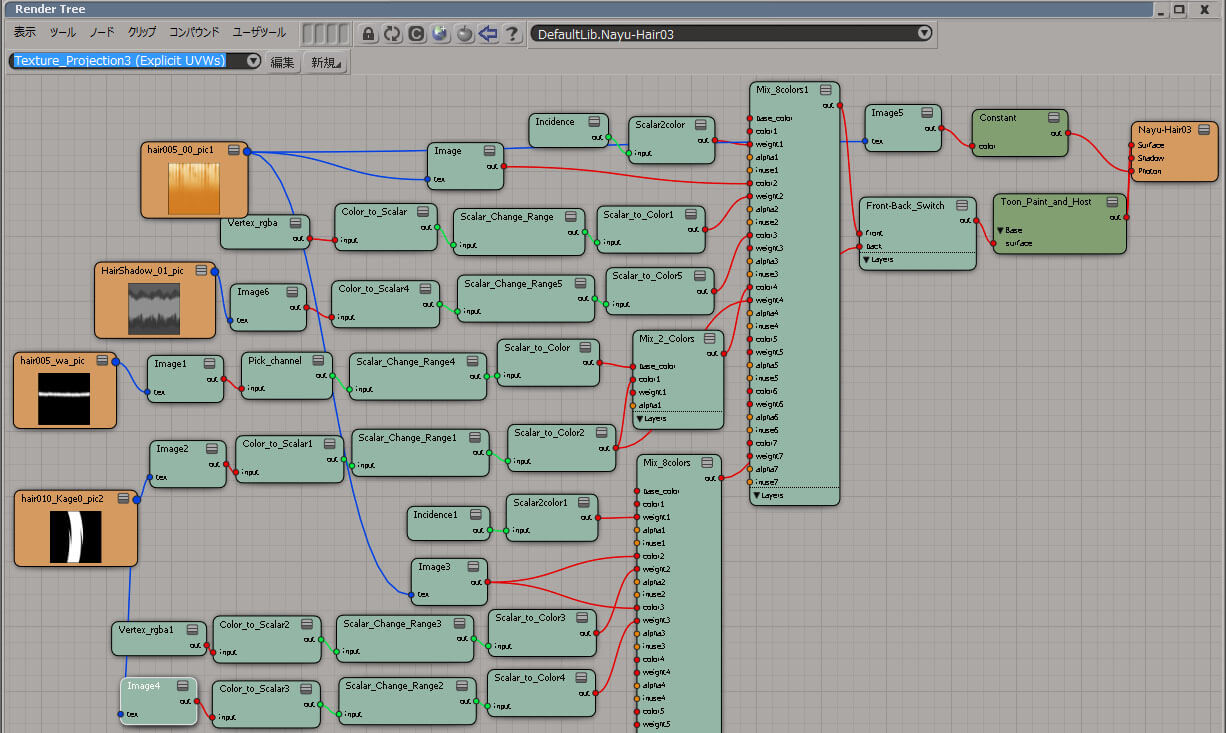 ↑大きな画像にリンク有り Click to large image このポリゴンには頂点色のアルファーが付けてあり、それが マテリアル色とテクスチャーの融合具合に使われています。 カメラのプロパティーで、シェードモードの頂点カラーをアルファーの表示にすると、このような頂点色が付いています。 Vertex_rgba ノードで頂点色情報を拾い、Scalar_Change_Range ノードで使う範囲を調整し、 Mixer_8colors のレイヤ2のcolor2に接続しているメインの髪のテクスチャー(オレンジ色の髪テクスチャー)の追加のウェイト2値になっています。 追加するモードは加算限界になっています。 また、Mixer_8colors のレイヤ1のbase_color とcolor1 の ウェイト1値 は、Incidence ノードでモードがサーフェイス/ライトの角度から来ています。 バイアス 0.675 ゲイン 0.359 です。 Let's see the settings of each textures . The polygon itself has vertex alpha data , which is used to blend material color and texture . In camera property , change the Shaded Mode Vertex Color to Show Alpha a color has drown as below . In RenderTree Vertex_rgba node get's this vertex data , reranged in Scalar_Change_Range node and pluged in to weight2 which is mixing in Add Bound mode of Mixer_8Color 's Layer2s color2 , and the main orenge hair texture . Also Mixer_8Color 's Layer1 base_color and color1 , in mixed with weight from Incidence , which mode is Surface/Light(Light List) with Shading Range 90-degree . Bias is 0.675 , Gain 0.359 . 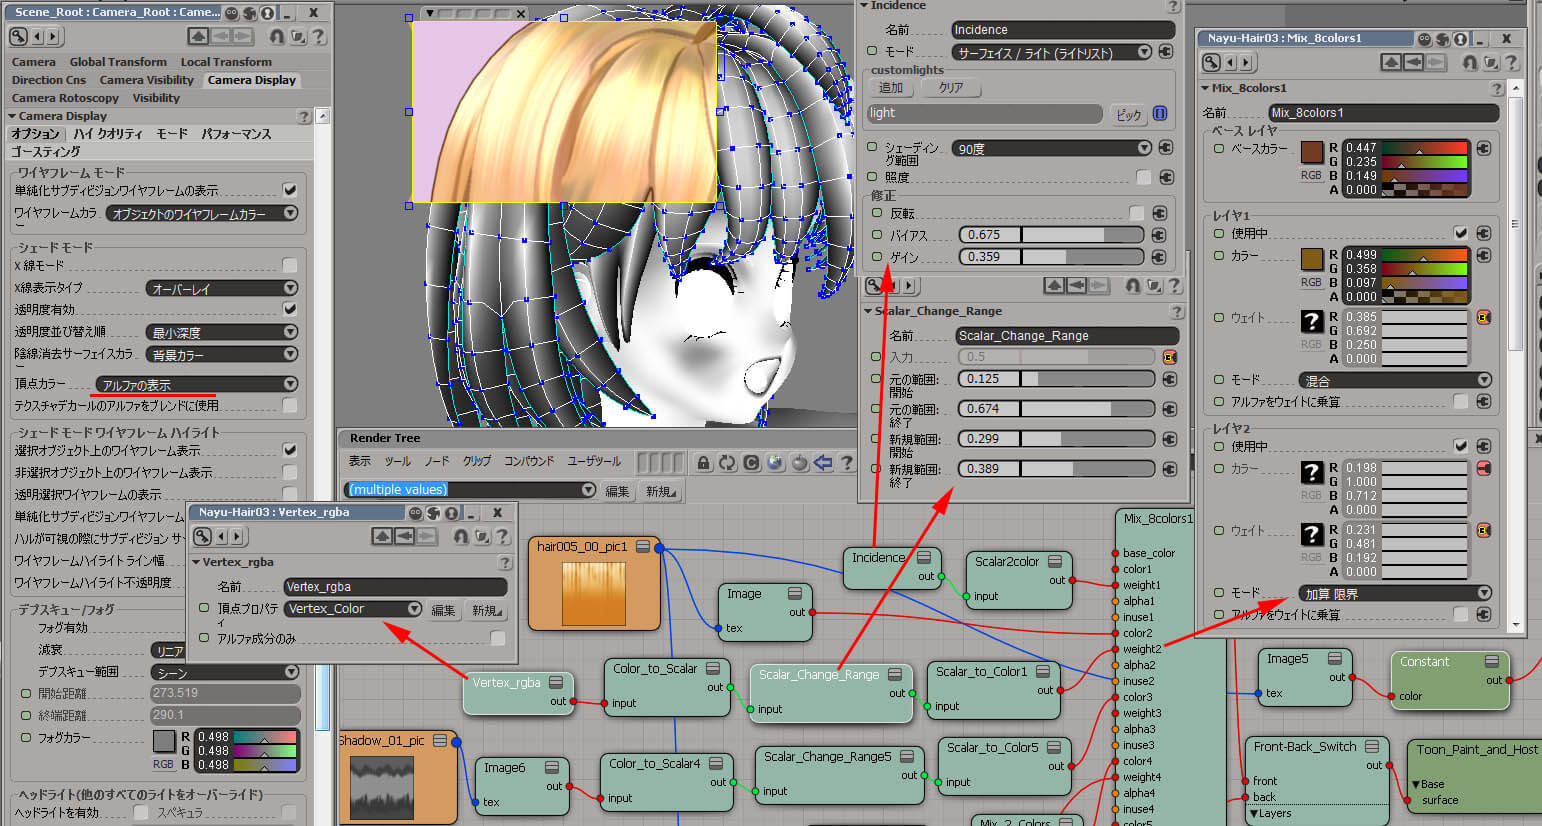 ↑大きな画像にリンク有り Click to large image The main hair texture's UV is set as below , not to overlap each other .  Highlight texture'sUV. Same to prevent for overlapping .  縦の暗くする部分を設定するテクスチャーとMix_2_Colors で追加してColor4につながってます。 Color4のウェイト値は縦の暗くする部分を設定するテクスチャーから来ていて、 モードは追加になっています。 Highlight texture is Scalar_Change_Range ing the Alpha data and is mixing the vertical shadow texture in Mix_2Colors in Add mode which is pluged into Mixer_8Color 's color4 . color4 weight is also coming form vertical shadow texture , and it's mode is Add . 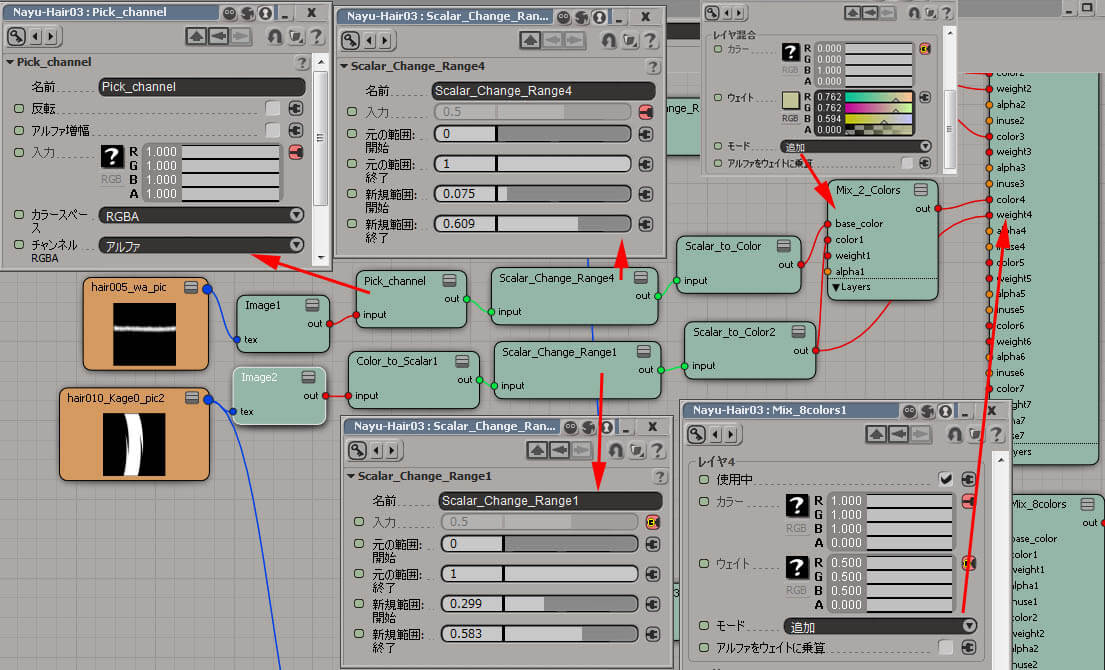 ↑大きな画像にリンク有り Click to large image 1束の形を強調することと模様にもなっています。 vertical shadow texture's UV coodinate. It's outstanding the hair bunch , and also making a vertical patterns . 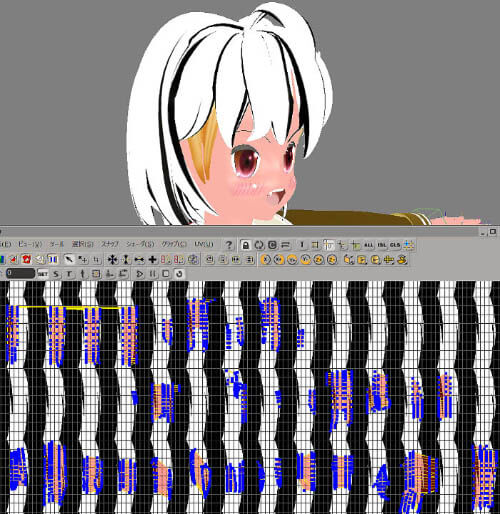 この絵は更に進化させれば面白効果を髪の毛の表現に得ることが出来そうです。 And the last texture in what is added this time . It's UV . This texture can have more progress , to get different hair visualization . 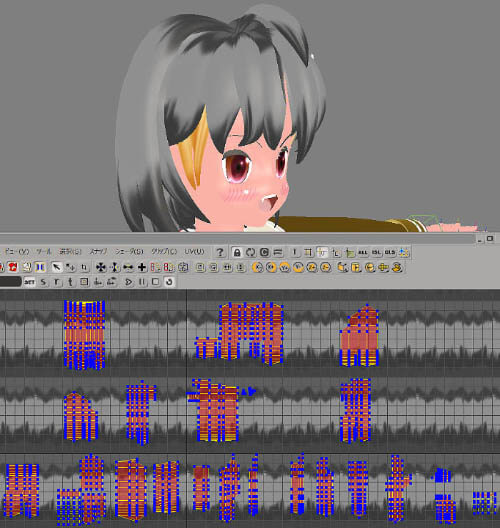 This added shadow texture is connected to color3 in mode Hard Light after Scalar_Change_Range node 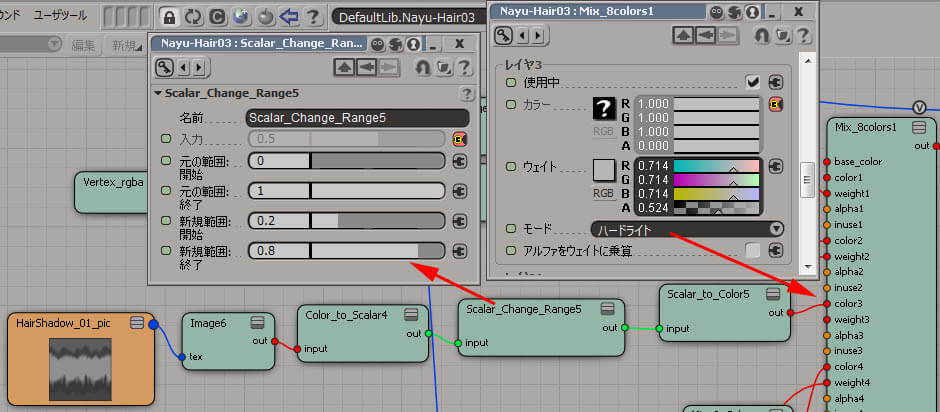 ↑大きな画像にリンク有り Click to large image ほっぺのテクスチャーも変更しています。 マテリアルはBody用のRenderTree設定の Color4 にモード混合で接続されています。 そのウェイト値はほっぺのテクスチャーのアルファー値を使用しています。 The cheek texture is changed , and is attached to color4 of body material in mode Mix . And this weight is coming from the cheek texture's Alpha data . 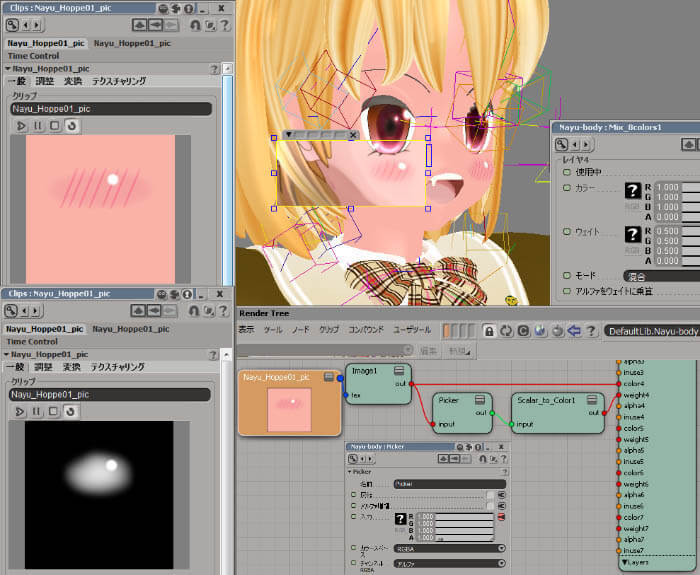 デキスチャーでしっかり質感を出しつつ、色と輪郭線調整をしてます。 ノード数は少ないように見えますが、設定は多岐にわたります。 The funny rabbit hair ornament material . The texture makes its feel of a material and the color and edge color has been made by toon . Looks not so many nodes , but the settings are quite a number .  ↑大きな画像にリンク有り Click to large image 声にも関係するかも知れないのですが、八重歯を追加してみました。 Incidentally ... double tooth . Might affect her voice , but added cute high canine. 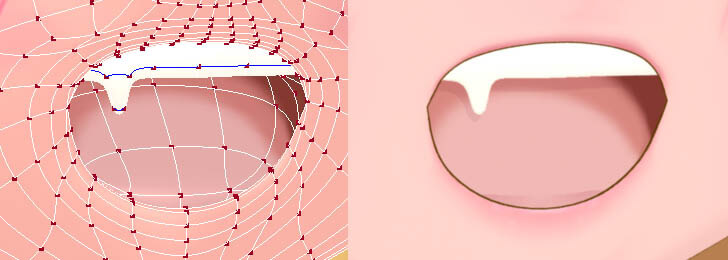 どういうことかと言うと、コンストラクションモードというカテゴリーでモデリングとシェープアニメーションとアニメーションが 分けられて処理されるようになっているからです。 このことを知っていると、モデリングをしながらシェープの変更やエンベロープの修正作業をする、というワークフローが成り立ちます。 Softimage lets modeling after you have enveloped .(Says non-destructive ) because it has a categorized Construction mode , which is Modeling , Shape Animation and Animation , the modeling does not interfere the shapes or envelope . Knowing this , you can put it into you workflow . 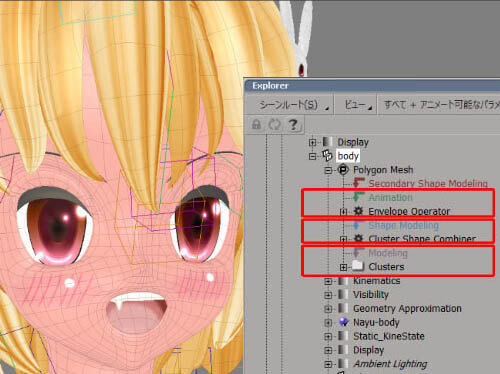 |
| 髪の毛;Hairアニメーション:Animation 動きが付くようにボーンの作成とエンベロープ設定です。 今はあまりボーン数は増やしていませんが、また後で設定を変えるかもしれません。 To move hairs , bones and envelope . Didn't make so many bones . 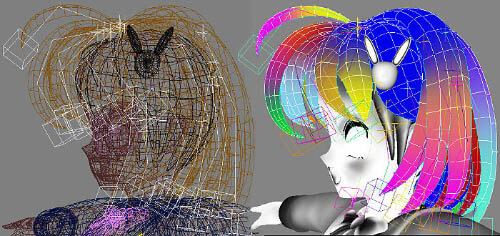 以下説明で出て来ますが、MotionBuilder にこの骨データを受け渡して、ユレモノ設定するのに利用してみました。
As explain below , used this bone in MotionBuilder to sway the hair . 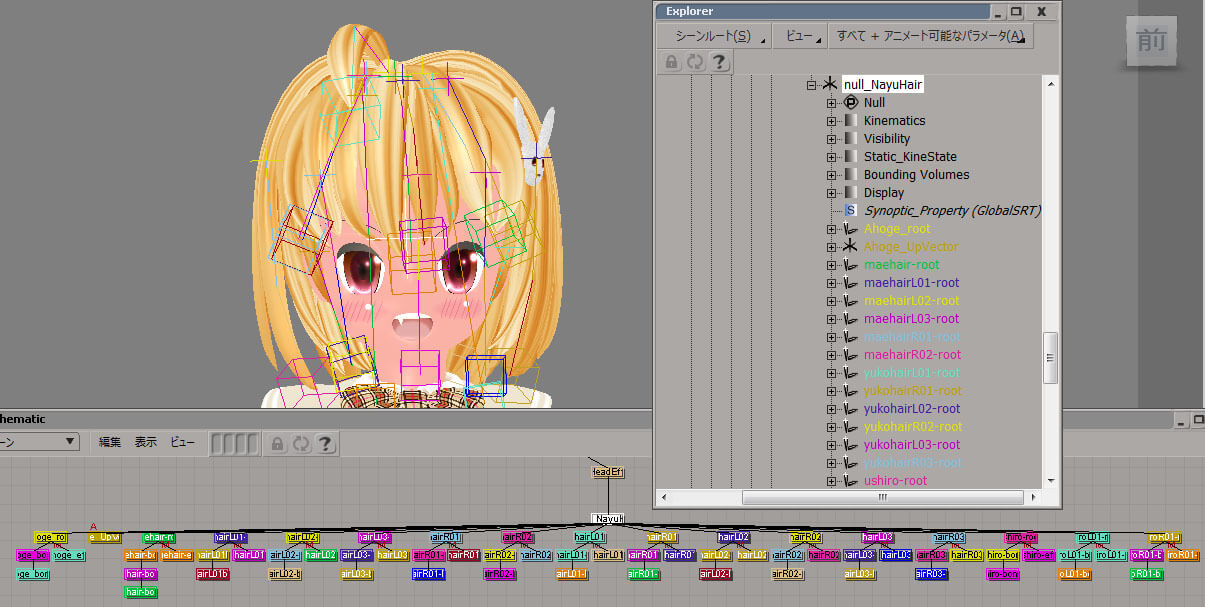 ↑大きな画像にリンク有り Click to large image |
| アニメーション;Animation MotionBuilder&ICE 以前から書いている通りの方法でりキャラにモーションキャプチャーの動きを付けます。 このキャラと同じ位置に存在する骨だけの構造体ShadowRig を MotionBuilder に持っていきます。 参照 >> は・じ・め・て・の MotionBuilder と Softimage その1 ですが、ここでMotionBuilder2014が登場!! このバージョンに搭載されたFlexibleMocap機能を使ってキャラクタラズしたデータにモーションデータをリターゲットします。 その内容をお伝えしたのがGTMF2013での講義発表内容でした。(GTMF2013内容は別ページにて公開予定) 所謂、今まで使用していたActorを使わない方法なのです。 ・ここで、1つ質問にお答えします。何故にこんなに複雑なことをしているの?です。 MotionBuilderからのデータをそのままのFKじゃなくて、IK Rig 構造体に乗せ換える為です。 そうすることによって、いつも手で付けている制御Rigのアニメーションとしてモーションデータを扱えるようになります。 As explained in other pages , put motion capture date to move it . Put into MotionBuilder the shadow rig which is bone only structure . See > My first MotionBuilder with Softimage No1 But here comes MotionBuilder 2014 . This version has FlexibleMocap feature , and used this to put motion on charactrized data . This imfomation was talked in GTMF2013seminar . (Pages about this is planned ) To talk straight , you don't use Actor any more . 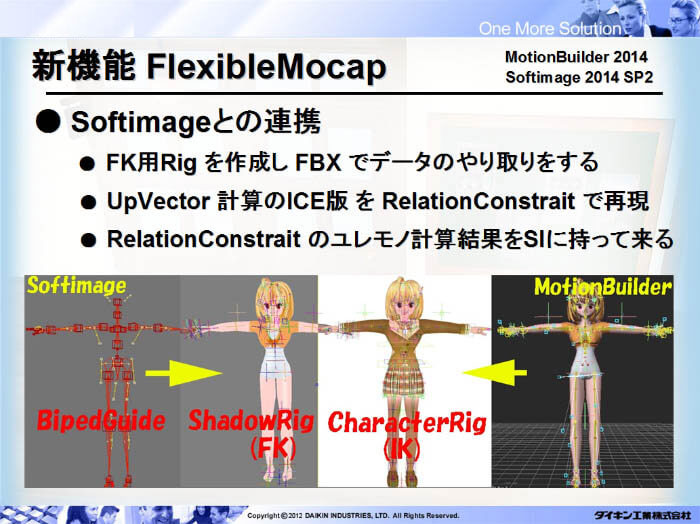 自分のIK-Rigにアニメーションが乗せ換えた結果です。 モーションデータをClip化にして管理すれば、いつでも切ったり貼ったり出来ます。 Below is showing the FBX from MotionBuilder 2014 and the motion data fix into IK-Rig . Managing these motion to Clips , you can use irt cutting and pasting . 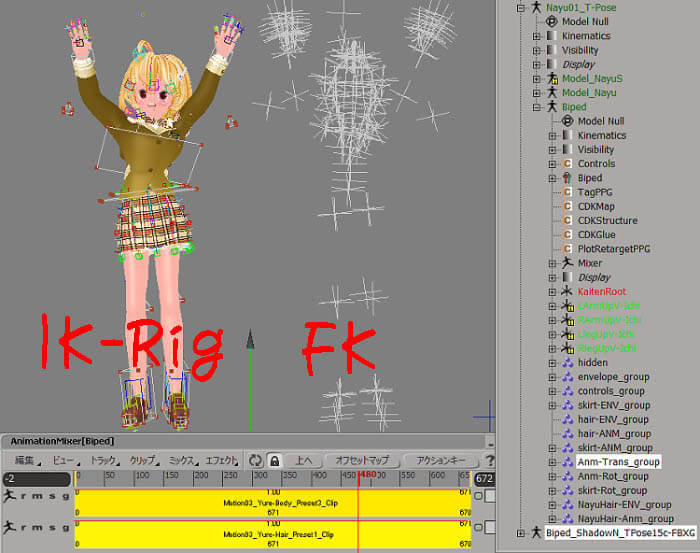 ある程度キーをリダクションしてMotionTrail機能を使うと早く修正できるかも知れません。 But fixing is needed , especialy swinging hair and bouncing ones .  |
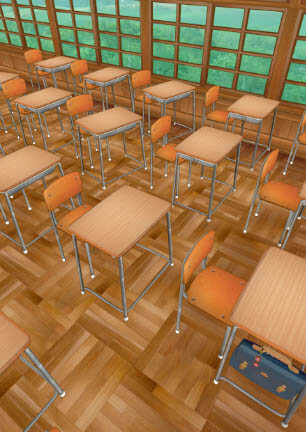
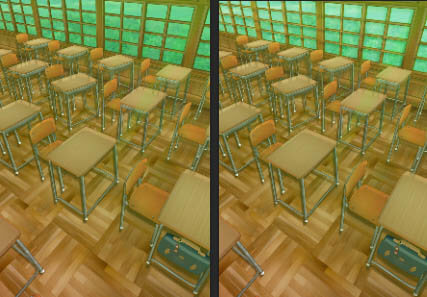
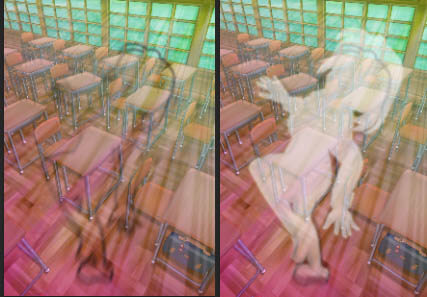
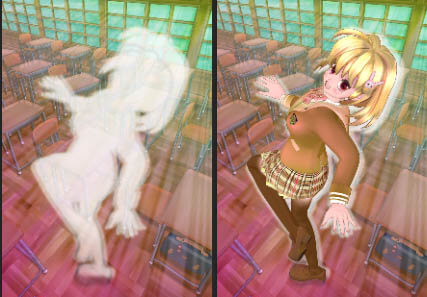
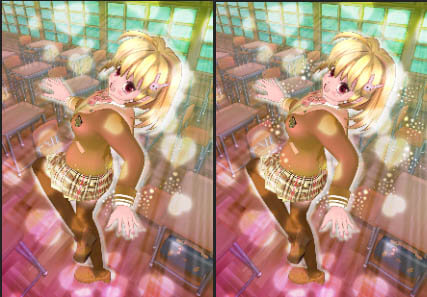
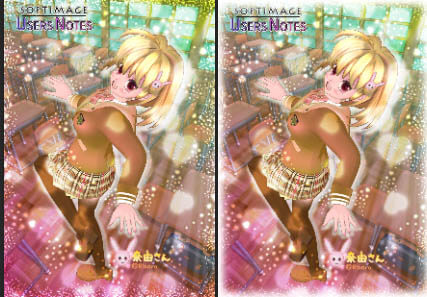
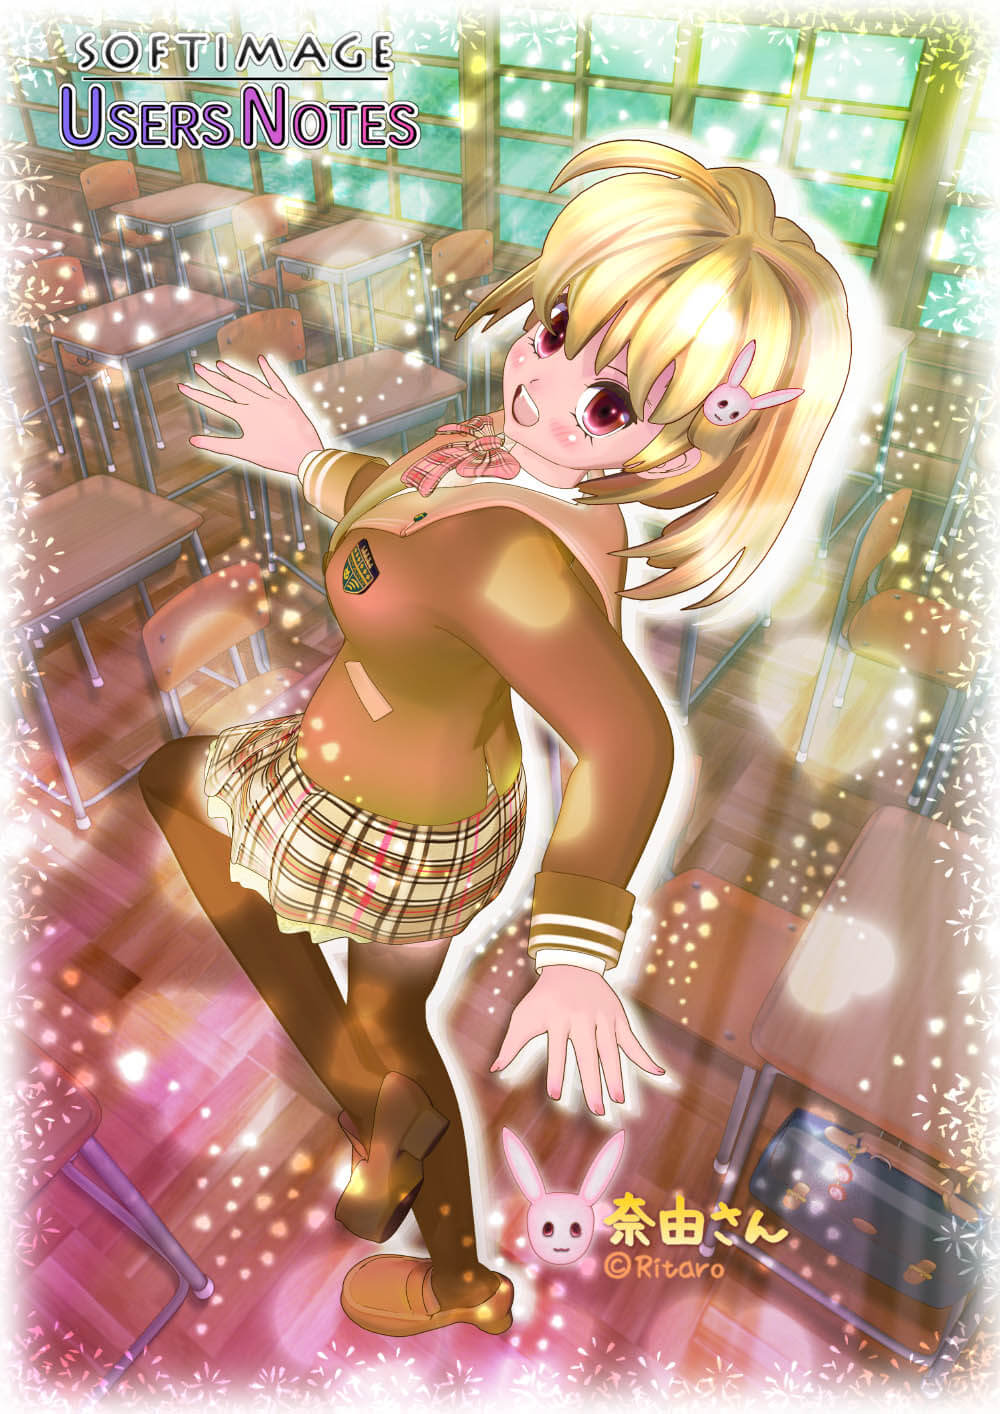
| ポース画の作成;Making Pose Picture せっかくMotionBuilderとの連携が出来ているので、ポーズ絵をモーションキャプチャーデータを元にイラストを作成してみましょう。 このポーズは、モーションMo03_020_001立ちポーズ5という一連のモーションの中の1フレームです。このポーズを元にします。 Having a workflow with MotionBuilder , let's make a pose illustration from MotionCapture data . Below is a motion No;Mo03_020_00 Standing pose . Taking a frame from this data . 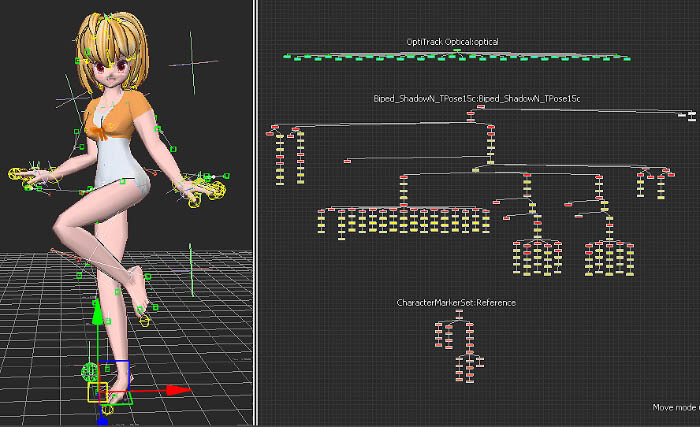 そしたら、今度は ControlRig を作成します。 ControlRig は HumanIK という フルボディーIK なので人間らしいポーズを作成するのに 持って来い です。 キーを打つ時はLayer1にです。参照 >> Animation Layer を使ったアニメーション編集 この動きを一旦 Biped_Shadowのスケルトンの Story の Clip にして UpVectorの計算をさせてから、FXB形式で保存します。(GTMF2013内容は別ページにて公開予定) First using FlexibleMocap , transfer motion movement to Biped_Shadow skeleton . Then , make Control Rig . This is HumanIK , which has FullBodyIK , easy to make humanic poses . Put the key to Animation Layer1 . See Edit Animation using Animation Layer Make this animation to a Story clip first , than make it calculate UpVecter then output this FBX . (Pages about this is planned ) 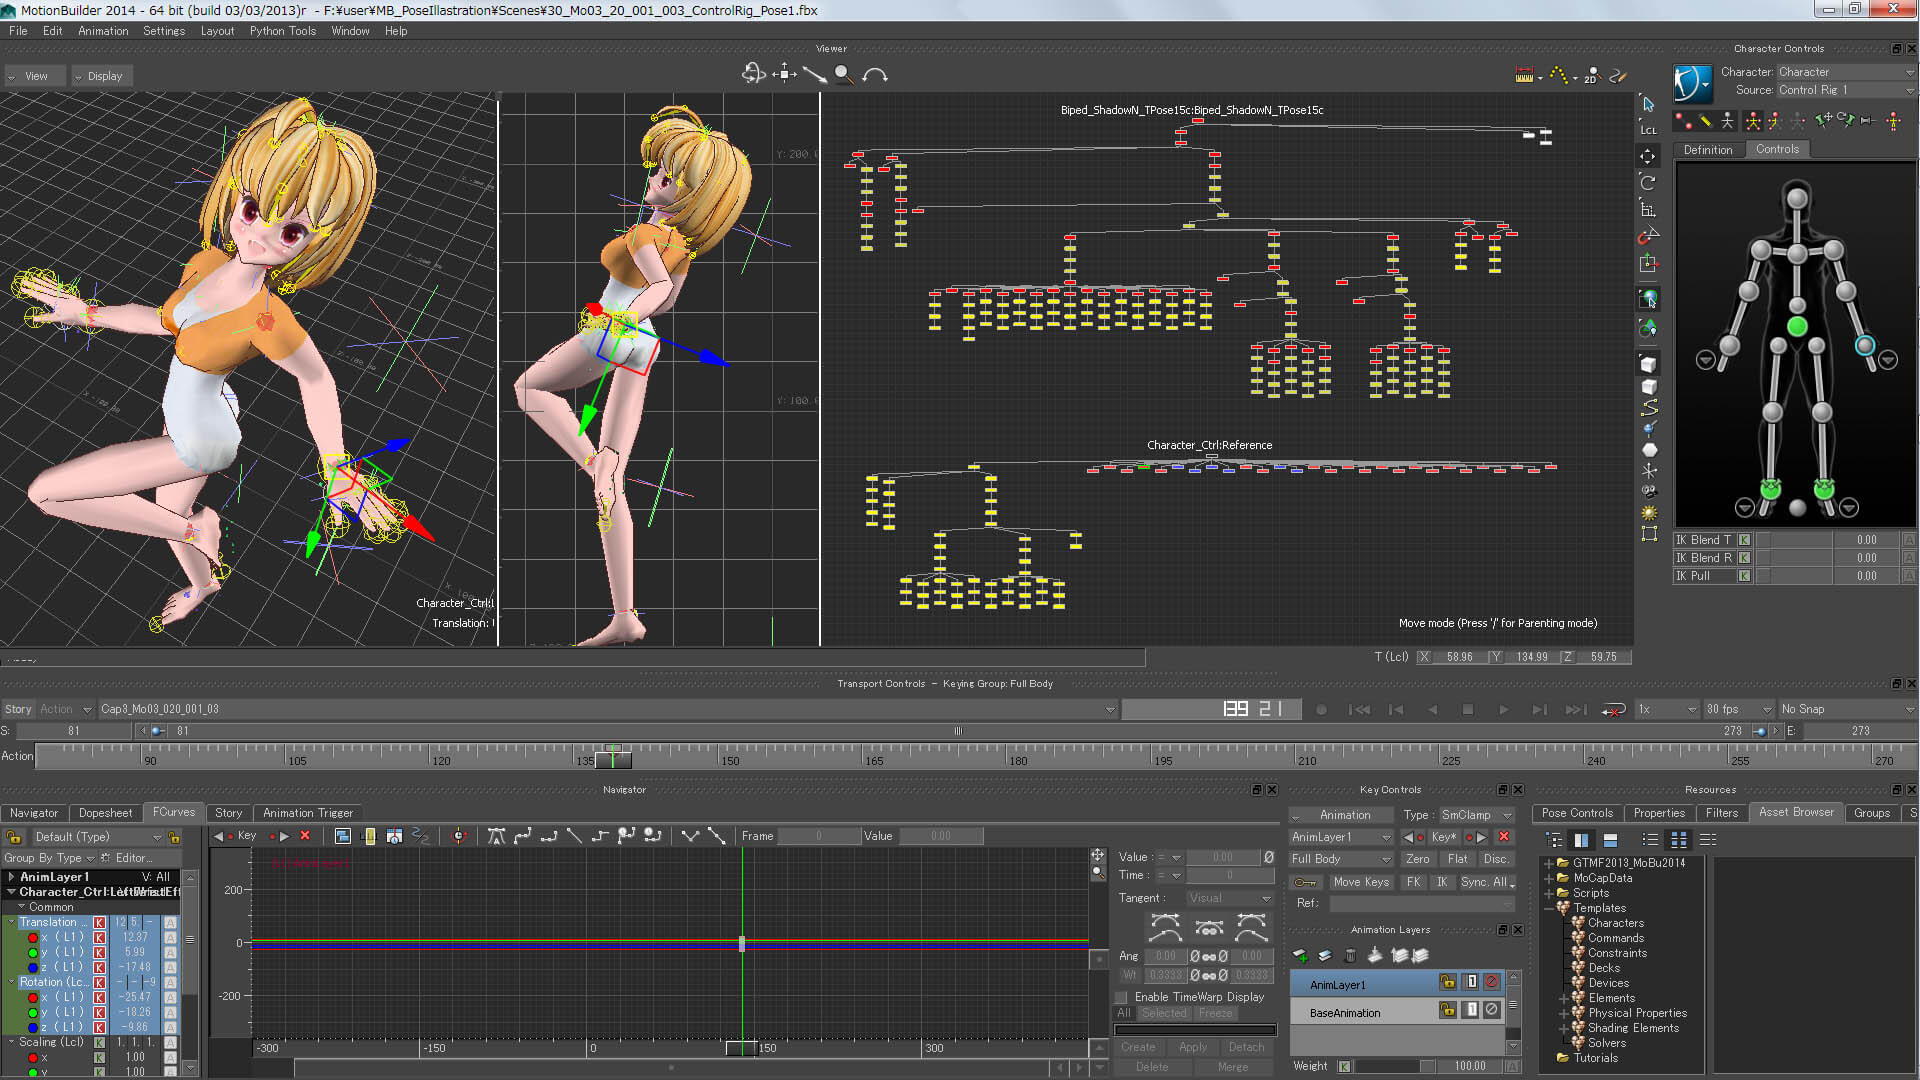 腕の中の骨は多少X軸回転を調整していますが、それはICEのリターゲット中に付加させています。 この状態から更にポーズの調整と、スカートや髪の毛、指など色々と好ましい形にしていきます。 So some explanaton had been cut here , but the resault here is pose has been into Softimage IK-Rig . The extra bones inside arms has been adjusted , additional rotation to X-axis . 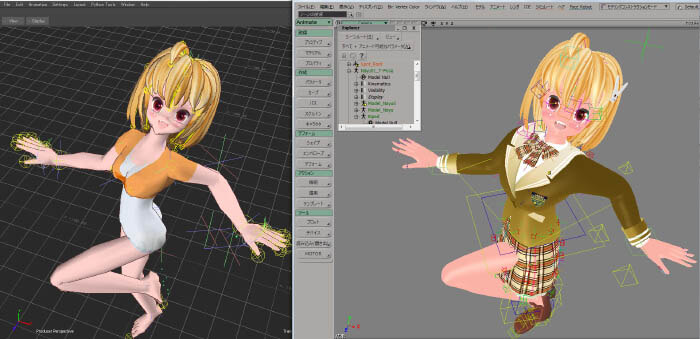 IK-Rig の位置データなのでシノプティックビュー(デフォルトではF3キー)も使えます。 シノプティックビュー は指や足まわりの動きを付けるのに本当に便利です。 Ajusting Camera and eye line below . As motion data has been built into IK-Rig , you can use Synoptic View(F3 Key). Synoptic View is truely good feature to handle fingers and legs . 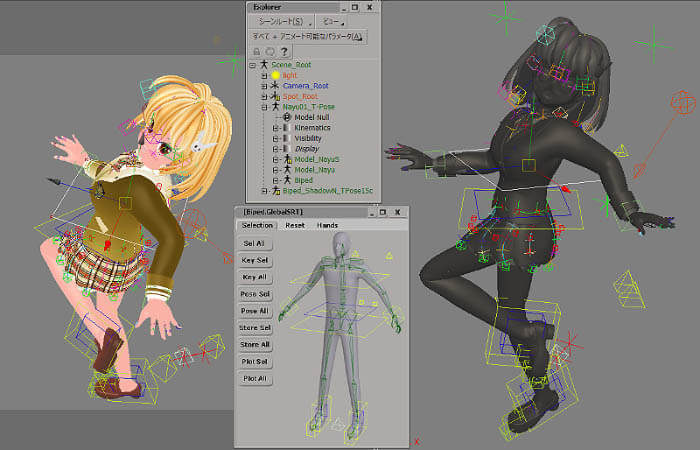 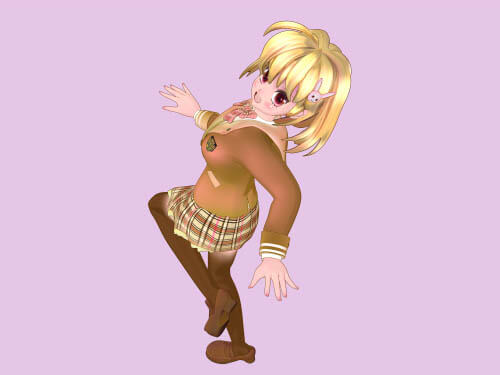 (お尻のライン、気にしてます...、あと胸も動いています)(Hip line is taken care of ) キャラとBGをレンダリングした画像同士を合わせると、BGは実際よりも手前にあった方が都合が良いことが解りました。(つまり位置的にはうそ) BGもレイヤー分けしてレンダリングしておきます。 The web top pages BG is school room , used here too. Putting the character to the room , the BG is more likely to have place a bit closer to the camera . (Meening it's not true ) Render BG to some layers(Pass). 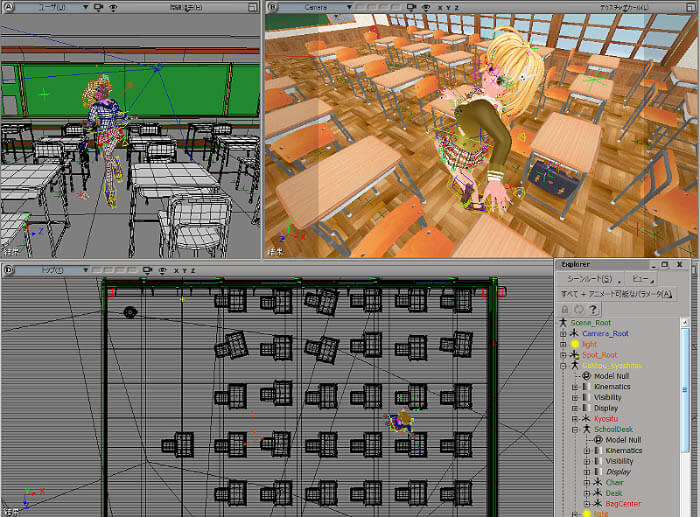 キャラクターが縦に長いので、印刷画面を縦にしたいとします。 でも、このままカメラを動かすと画角が変わってしますのと、細かい位置調整をしたい場合に簡単便利な手順です!! まず、カメラの注目点とカメラの間をリニアのカーブをスナップ機能(中心にチェック)を使って描きます。 カーブの中心点は下側の点の位置にします。(頂点を赤色選択にして、Transform > センターを選択した頂点に移動) そのカーブにNULLをパスコンストレイントを設定します。設定でタンジャンシにもチェックを入れます。 注目点とカメラをそのNULLの子供にします。これだけです。 あとはパスの%にアニメーションを動かしたり、カーブのスケールを変えるだけで、この線上をどこまででも動かせます。 Here , I will show a simple Camera Rig . As the character is long verticaly , wanted the print page to be verticaly long . But when you move the camera , the angle will change . So here the solution . First , make a linear curve between Cammera and it's Interest , using Snap with center . Make the curve's center to the bottom point . Make a Null Path Animation to the Linear Curve with tangency ON. Put Cammera and it's Interest child of that Null . Done , move % of Path Animation or Scale the Linear Curve to move Camera . 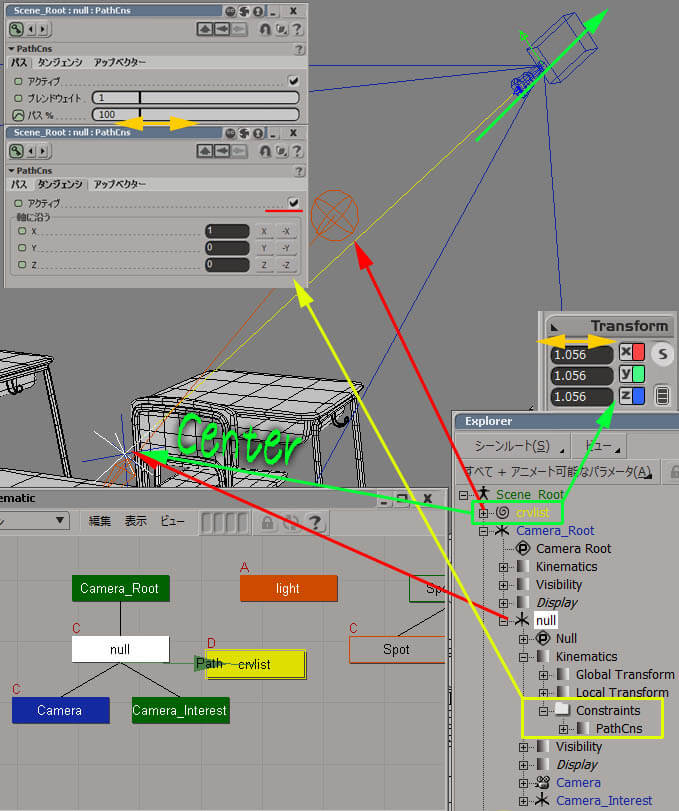 揃えた素材をドンドン付け加えていきます。変化をお楽しみください。扱っている解像度サイズはA3縦300dpi です。 From here this is only 2D edditing . Going straight to finishing the illustration . Just adding materials and tweeks . See how it changes . The Picture size is 3500x4961 300dpi .
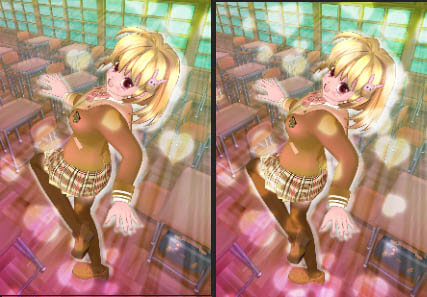
ということでイラスト風の画像をモーションキャプチャーデータから作成した例でした。 好んでくれるといいのですが。。 Here is the final look . A picture made from MotionCapture Pose . Hope you like it ..
|
| という訳で、次回もこのキャラクターと講義内容のようです。。 乞う、ご期待!!
|