- ITソリューショントップ
-
製品・ソリューション
-
ダイキンのIT
 製造業向けITソリューション
 品質DX支援 QX digital solution
 建設業務改善ソリューション
 ビル管理業務支援 DK-CONNECT BM
 FILDER SiX TOP
 FILDER SiX 電気 TOP
 Rebro D TOP
 実験記録をデータベース化 ParsleyLab
 マテリアルサイエンス向けソフト Materials Studio
 熱力学物性予測ソフトウェア COSMO
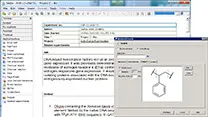 電子実験ノート
 総合3DCG 制作ソフトウェア Maya
 総合3DCG 制作ソフトウェア 3ds Max
 3Dキャラクタアニメーション制作ソフトウェア MotionBuilder
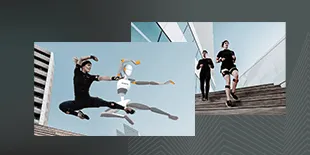 モーションキャプチャーシステム Xsens MVN
|
プロローグ ; Prologue
|
| リタイミング;Retiming 音声ファイルをシーン直下の Mixer上 のオーディオトラックに配置します。
キャラクターモデルも表示処理の軽いモーション用のポリゴンを使います(骨は共通)。 今回の音声台詞、”私香奈です、よろしくね、うふふっ”にあわせた動作を考えると、”ね”で手の動作が終わると考えられます。 だとすると、何も動作していない部分と、動作が始まってから終わるまでを分割し、 動作の緩急が付いたアニメーションを想定します。 この動きの調整は AnimationMixer が最も得意とするところです。 ”ね”にあわせて Nキーボタンでクリップ分割し(クリップ > 分割) 動作の移る直前でもう1つ分割して、動きのタイミングと速度調整が行えます。 クリップ > コンパウンドの作成をした後、クリップ > 新規ソースにフリーズを実行して新しい1つの Clip にまとめます。 Put the Audio Wav file on the Mixer under the Scene_Root. Use Low Polygon Character to maintain the viewing speed (Bone structure is same as High Polygon) Hearing the Voice , divide the clip with N Key to fit with it. Also, make the animation that has a slow part and a fast part, which will give the animation more attractive. Use Clip>Create Compound to make Clips into one compound, then use Clip>Freeze to New Source to make up in a new Clip. 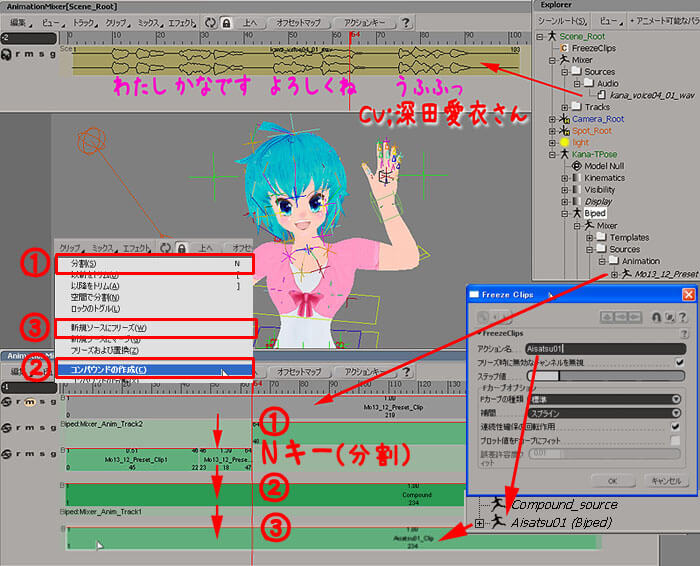 エクスプローラー画面の Mixer 内の Sources にある Clip を選択状態にしてアニメートモジュール > アクション > 適応 > アクションを実行します。 実行後、試しに UpperBody を選択してみると、下のタイムラインが全フレ、キーが打たれた状態になったことがわかります。 Then, put the Clip animation to FCurve animation for more tweeks. In Animate Module > Actions > Apply > Action , all animation will be put into normal key animation. To see, select a part like UpperBody , timeline will show all frames has keyed animation. 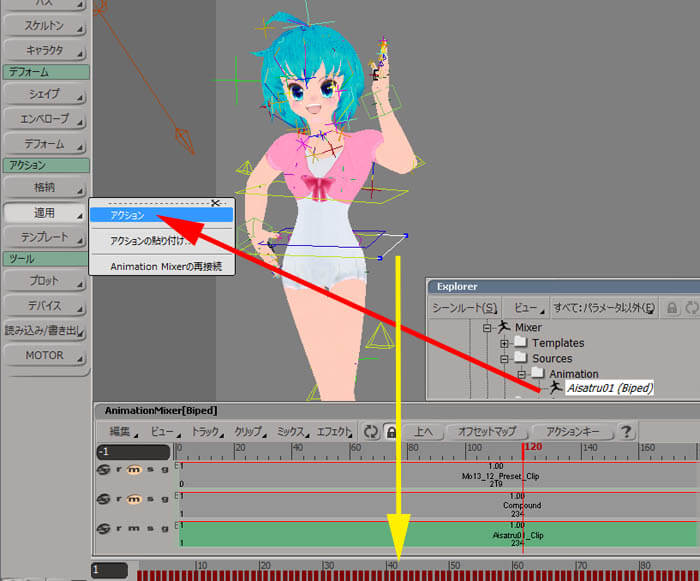 |
| キーリダクション;KeyReduction 作風により、リアルさを求めるものと、コマ抜きアニメーション的にするものとあると思います。 ここでは後者的で、動き間はなるべく動かない状態があり、動きにも緩急があるようにします。 キーはなるべく削減する作業で FCurve を編集することになります。 Some product wants realistic , some one wants more like limited animation. In this case is Anime (Japanese cartoon) like animation, so key reduction and fast&slow animation is needed. To achieve that, FCurve edditing is best. 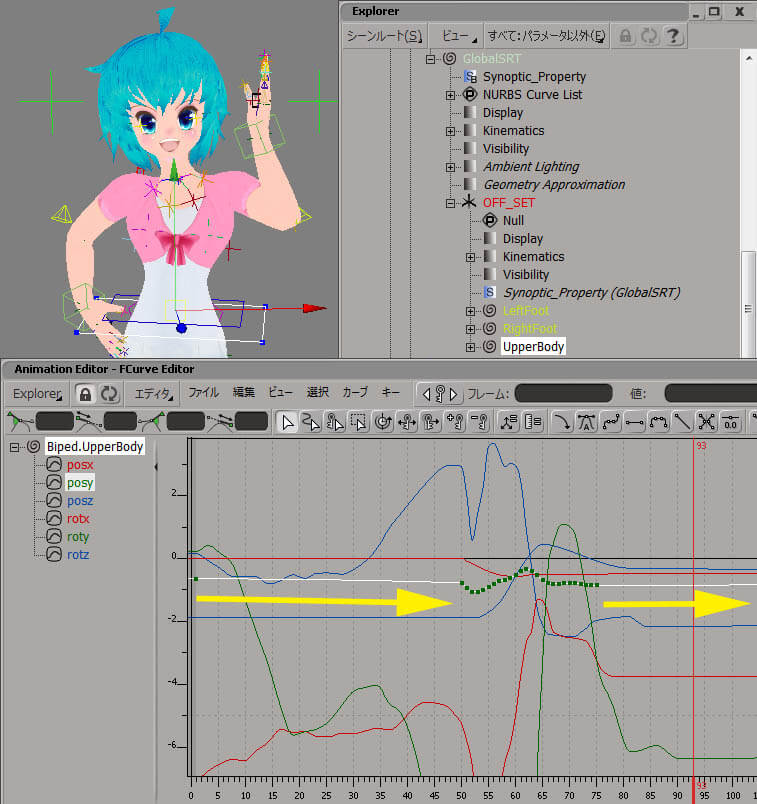 あまり削減してしまってはせっかくの動きが無くなってしまったり、回転キーを削減すると思わぬ変な動きになってりまったり、 結構コツが必要だったりします。 手の動きなど、目的の動きを達成した後、人間らしい反動を残すか、ビタ止めするかで作風も変わるでしょう。 This Key Reduction must be done from the top level of the Rig. Sometime over reduction makes animation funny ,sometimes rotation key reduction makes bad results. This might be how experienced. Like animation in hand, after the hand has reached the finishing point, leaving reaction gets realistic, cutting the reaction will be like cartoon animation. 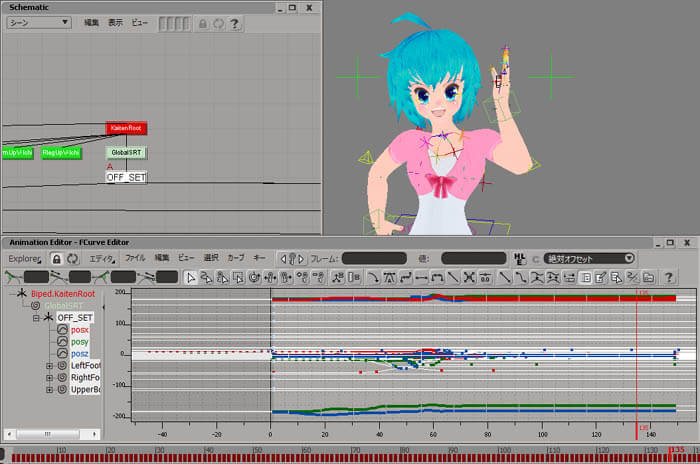 実際にレンダリングするポリゴンモデルに切り替えて動きを見ます。 "ビューポートのキャプチャー"機能で画面の動きをムービー化して確認し、動きを調整していきます。。 One way of key reduction is, reduce translate animation very high but no in rotation. Put the character to high poly and see the movement. Use "Start Capture" to get AVI movie to see the animation , and fix it more suitable. 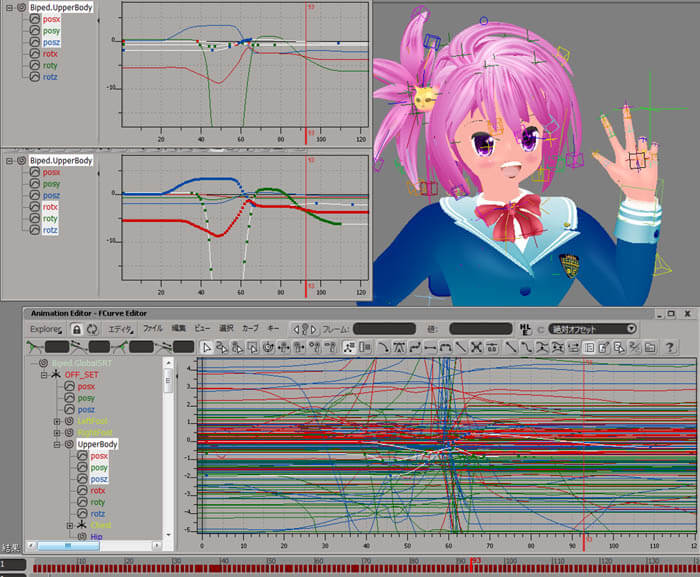 |
| 追加アニメーションの作成;Making additional animation モーションキャプチャーに含まれないアニメーションは作らねばなりません。 指の動き、髪の毛の動き、服の動きなどです。 更には、肉体の動きなども考えられますね、腹や胸、筋肉などもあるでしょう。 こういった動きは MotionBuilder のリジッドボディダイナミクス、 Softimage の ICE など色々考えられて今後取り上げられる題材になりそうです。 ここでは指と髪の毛の動きを手付けのキーアニメーションで済ましています。 まずは指ですが、BipedRigのどれかを選択状態にしてF3キーを押すと表示されるシノプティックビューを利用します。 Handsタブをクリックし、その中の[Sliders]ボタンを押すとさらにスライダー画面が表示されます。 Animation that doesn't have inside MotionCaptureDate has to be made,like Fingers, Hair, Clothes. Thinking more will be skins and muscles. For those, you can use MotionBuilder's RBD,Softimage ICE, which will be good subject later on. Here , is just an Key animation for Fingers and Hair. For Fingers, used Synoptic View which will appear pressing F3 Key when selecting one of BipedRig. Click Hands tab , also pessing [Sliders] button, you get slider menu. 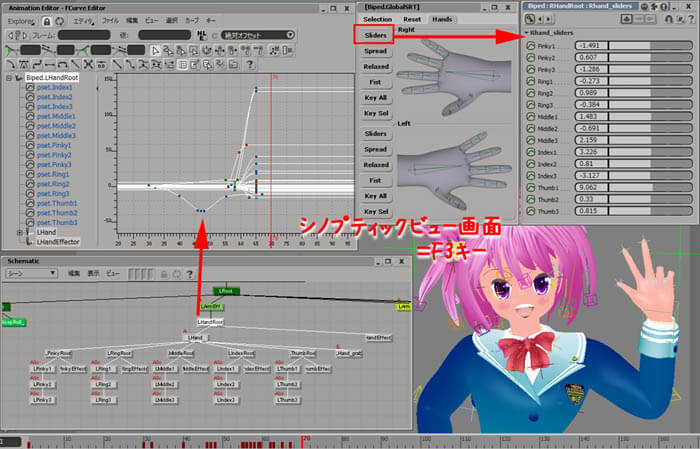 カスタムなRigを作っている場合はぜひ作ってみると効率が上がるものと思われます。 This Synoptic View is made of HTML and jpg , so if using a custom rig , make your original Synoptic that will help you very much. 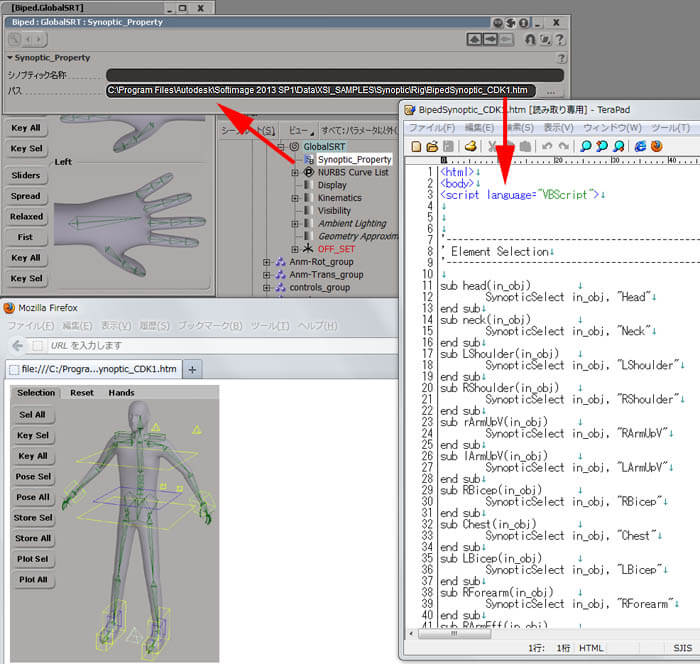 部分的に動きに違いや延滞を発生させるとそれっぽいアニメーションが簡単に付きます。 Hair animation is a simple one. Just make some individual movements, maching with the body animation. 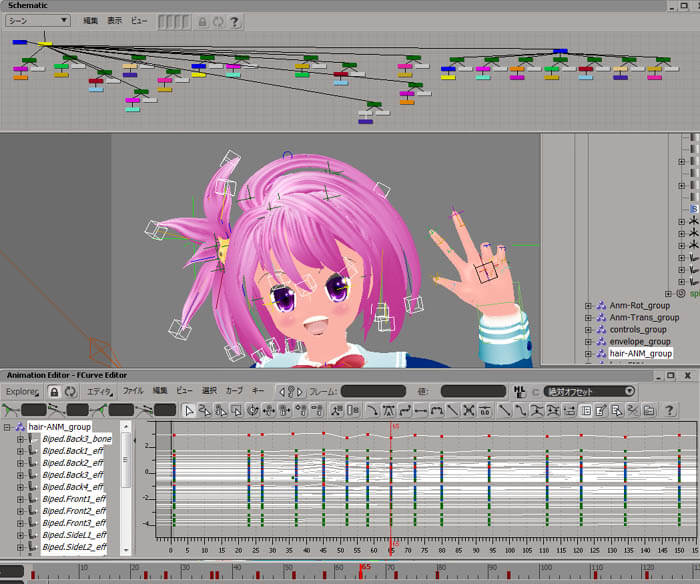 |
| フェイシャルアニメーション;Facial animation さて、ようやくここに来ました。声に合わせて顔の表情(目パチ、眉、口パク)を作成します。 もちろん、シェープマネージャーを使うのですが、以前のページ>> リップシンクの設定で作成した グラフィカルなカスタムPPGを使って主な口パクは作ってしまいます。 とっても簡単、あ で終わる言葉は”あ”ボタンを押すだけです。 Finally, got here, where you make facial animation with voice audio. Of course using the default ShapeManager, but Lip animation is made using CustomGraphicalPPG which was made earlier > Lipsync. 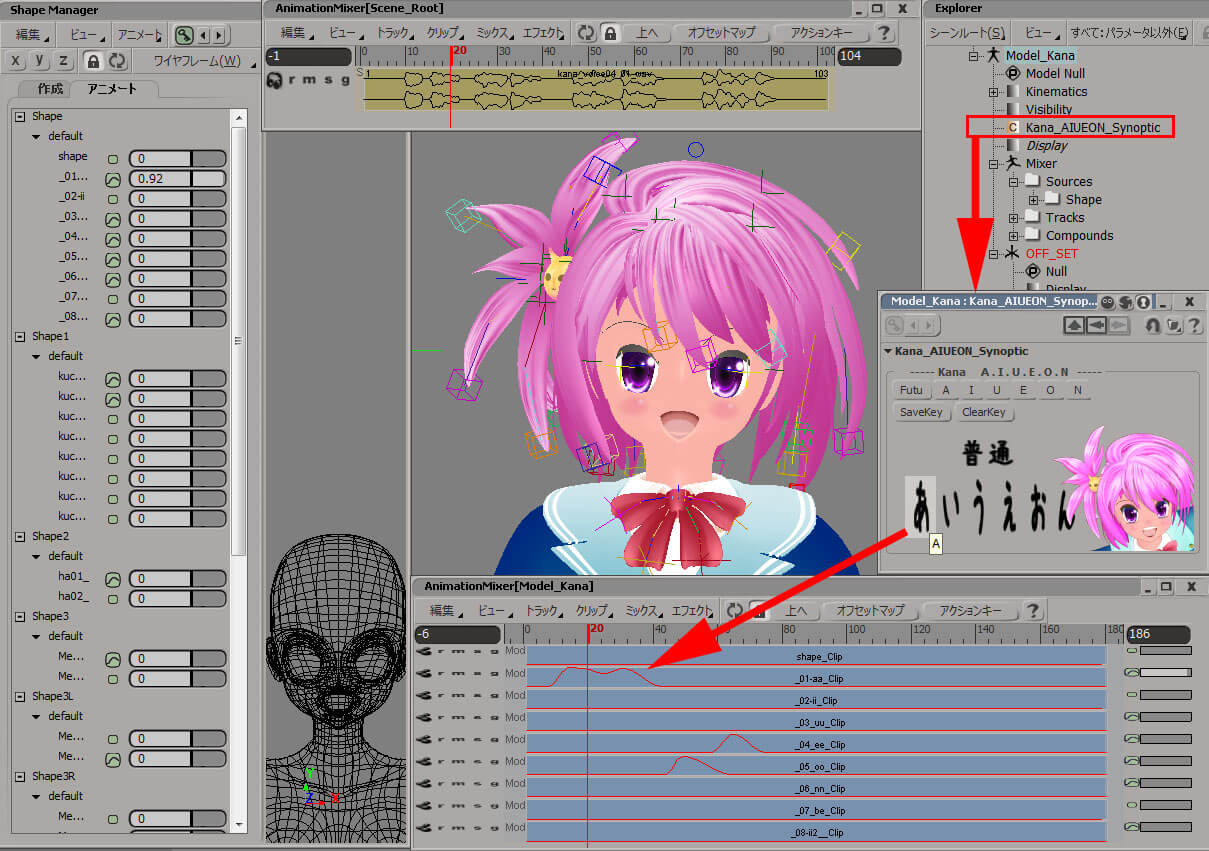 目パチも重要で、タイミング良く入れてあげるとキャラが生きてきます。 Lip animation also has realism or limited animation , to which product your are making. Eyebrow animation is important too, that makes character live. 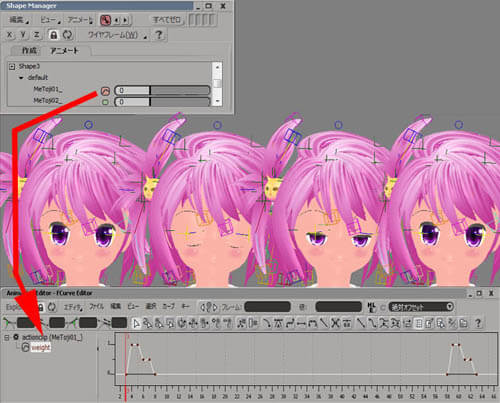 Render few frames and tweek the toon rendering settings, than render all and view it in Flipbook. 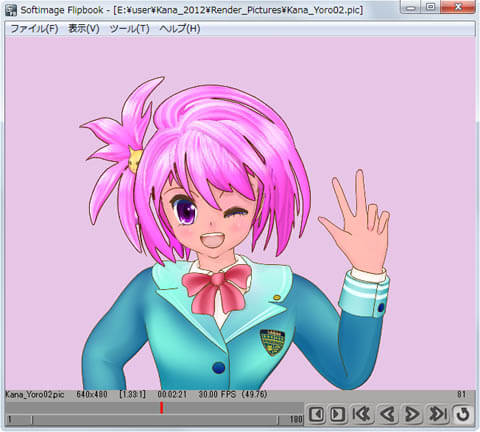 |
| コンポジット;Composite 今回も最後は Softimage 内にあるコンポジットツールである FXTree を使ってみました。 BGに Grad(グラデーション)によるグラシアンブラーをかけ、Resize にアニメーションをかけて動かしています。 別シーンで作成したICEのキラキラを上に乗せてみました。 Used default composite tool inside Softimage FXTree, again. BackGround picture has GaussianBlur influenced by Grad,Resize has it's movement. Added ICE particle effect over using MathComposite. 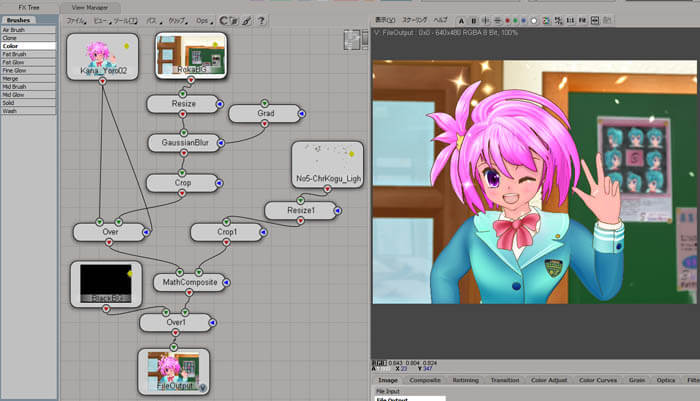 |
| ムービー;Movie という訳で、ようやくここに来ました、まーメイキングだし。 At last the result movie. MP4
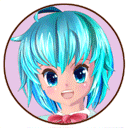
CV 深田愛衣さんです。
|
| という訳で、次回 は・・・・ 新曲来るか? お楽しみですねプロレベルでいきましょう!!! 乞う、ご期待!!
|