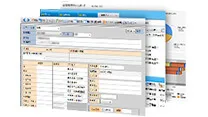
Rendering job submit tool for Backburner(DKN_BackBurner_for_Softimage)
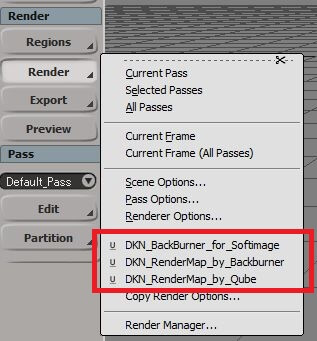
It is easy to use. Load the scene and execute Render > Render > DKN_BackBurner_for_Softimage
The scene must be accessed by UNC path, usually, the scene is loaded from file server.
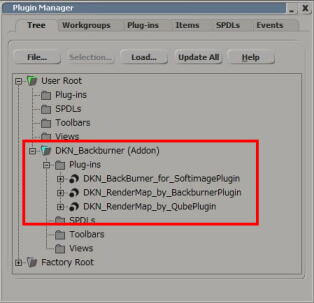
In the Explorer, new property will be created under the Scene_Root then it's property will be inspected.
If you are using Backburner from Maya, the parameters in this property page are familiar-looking for you.
After setup these parameters, click "Submit" button to submit jobs.
DKN_BackBurner_for_Softimage proprty remains under the Scene_Root, if necessary, you can inspect this property and submit jobs again, if not necessary, delete it.
|
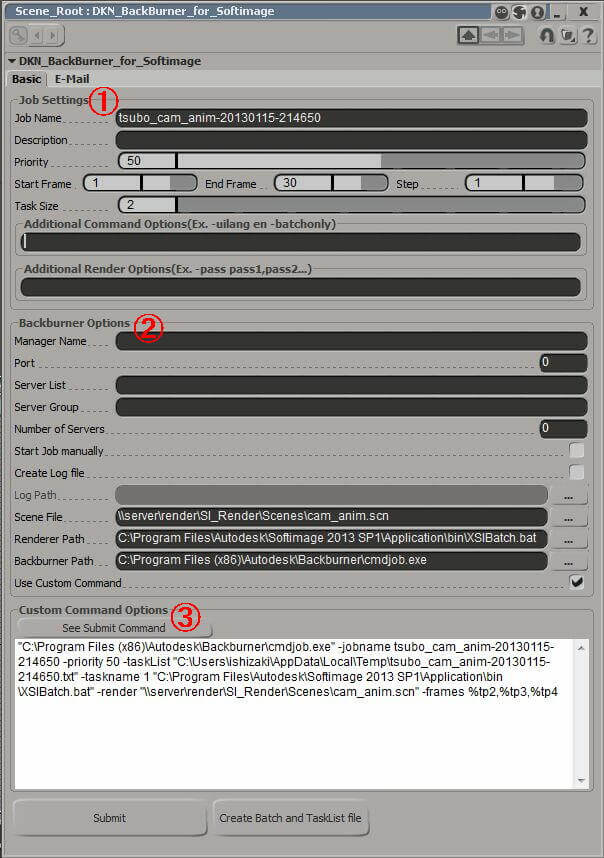
① |
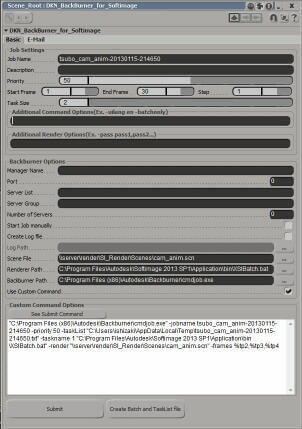
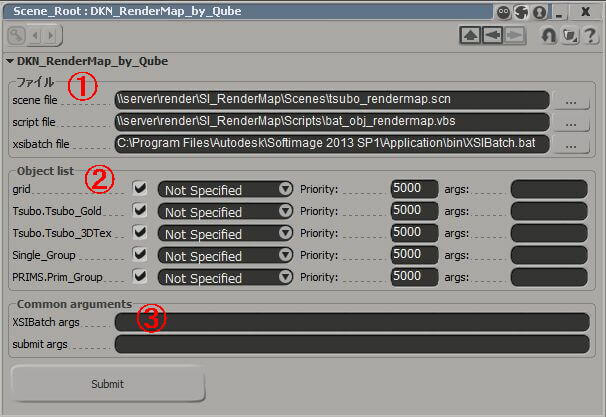
Job Setting
Job Name:
Specify the job name. Default is <scene name>-<date>-<time>
Description:
Description of the job.
Priority:
Priority of the job. Default is 50, possible value is 0(max) to 100(suspend)
Start Frame, End Frame, Step:
Specify the start/end/step frame to render.
Task Size:
Specify the number of frames per one job that assigned to each servers.
Additional Command Options:
Specify the command options for
xsibatch command.
For example, when you use Japanese UI, garbled characters log will output.
You can avoid it by use "-uilang en" option.
Additional Render Options:
Specify the rendering options for xsibatch command.
For example, you can specify "-pass pass1,pass2" to specify the pass to render. |
| ② |
Backburner Options
Manager Name:
Specify the machine name that working Backburner manager.
If not specified, Backburner manager will be detected automatically.
Port:
Specify the port number. Usually you don't need change it.
Server List:
Specify the server name. To specify multiple servers, you can use ;(semicolon) as the delimiter.
If the Server Group is specified, this field is grayed out.
If both the Server List and Server Group are not specified, submitted jobs are assigned automatically.
Server Group:
Specify the server group.
If the
Server List is specifed, this field is grayed out.
If both the
Server List and Server Group are not specified, submitted jobs are assigned automatically.
Number of Servers:
The maximum number of servers that submitted jobs.
Start Job manually:
Submit suspended jobs, the jobs can be started manually.
Create Log file/Log Path:
When turn on, the log file will be created.
Specify the folder that output the log file.
The folder must be existed.
Scene File:
Specify the scene file by UNC path.
Default is the current scene file.
Renderer Path:
Specify the
xsiBatch.bat file by full path.
Backburner Path:
Specify the
Backburner's cmdjob.exe file by full path.
Use Custom Command:
If you want to use custom command, turn on this checkbox.
|
| ③ |
Custom Command Options
See Submit Command:
Show actual submitted command.
When turn on "Use Custom Commands", this "See Submit Command" button must be clicked.
You can edit options in this field.
If turn off "Use Custom Commands", this field is grayed out.
Submit:
Output the Task list and submit jobs.
Create Batch and TaskList file:
Output the batch file and task list without submit the jobs.
In C:\Users\<username>\AppData\Local\Temp folder, <job name>.bat、<job name>.txt are created.
Usually Batch file is not used, it is useful when submit jobs from command prompt.
Note: Task list and batch file will not be removed automatically,
so sometimes please remove these files manually. |
|
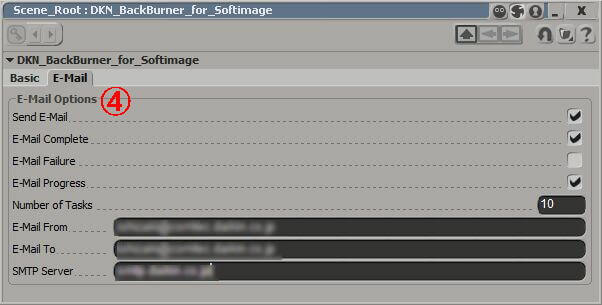
④ |
E-Mail Options
Send E-Mail:
When turn on, use send E-Mail feature.
E-Mail Complete:
When job is completed, E-Mail will be sent.
E-Mail Failure:
When failure the job, E-Mail will be sent.
E-Mail Progress/Number of Tasks:
When this number of tasks are completed, E-Mail will be sent.
E-Mail From/E-Mail To/SMTP Server:
Specify the E-Mail address of send to/from and SMTP server.
|
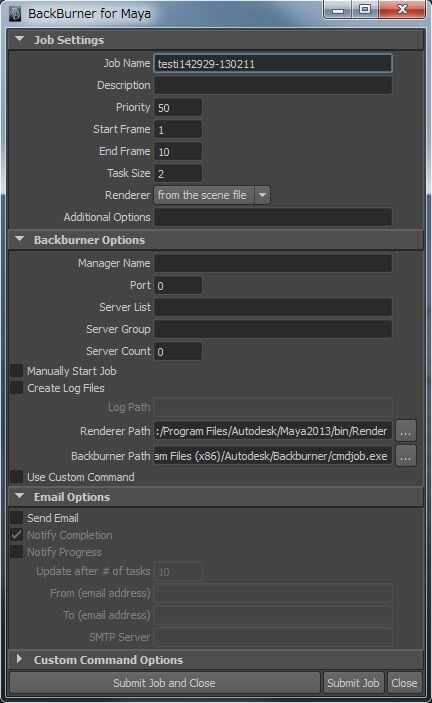
For reference, the following is the submit menu of Maya. In Maya, you can submit jobs in Render > Create Backburner Job menu.
Please check the menu items are almost same. But layout is little different...
Next is some additional explanation.
<About the Task list>
In
Maya, when submit the jobs to Backburner, the task list is created, then submitted jobs are assigned to rendering server according to this task.
For example, in the case of start frame is 1/end frame is 30/task size is 6, 1-6 frames are assigned to <Server1>, 7-12 frames are assigned to <Server2>,
13-18 frames are assigned to <Server3>....
Task list is created in C:\Users\<username>\AppData\Local\Temp\<job name>.txt. The following is the format.
It describes TaskID, start frame, end frame.
frames1-6 1 6
frames7-12 7 12
frames13-18 13 18
frames19-24 19 24
frames25-30 25 30 |
Basically DKN_BackBurner_for_Softimage tool adopt same design. The point of difference is the "step value" is available.
For Example, in the case of start frame is 1/end frame is 30/step is 3/task size is 4, the task list is output as follows.
It describes TaskID, start frame, end frame, step value.
4 frames are assigned for each tasks.
frames1-10 1 10 3
frames13-22 13 22 3
frames25-30 25 30 3 |
Note: Task list and batch file will not be removed automatically. Sometimes please remove these files manually.
<Additional Command Options>
Specify the command options for xsibatch command. You can confirm available options in the Softimage command prompt as follows.
xsibatch -help
Not so many effective options. But if you are using Softimage in Japanese menu, the output log include garbled characters.
To avoid it, you can specify English mode option.
-uilang en
But when invoke Softimage next time, Softimage will start as English UI mode, so you need restart as Japanese mode or invoke Softimage using next options.
-uilang jp
<Additional Render Options>
Specify the rendering options for
xsibatch command. Also you can confirm available options in the Softimage command prompt as follows.
xsibatch -help
For example, following options are available.
-pass <pass1;pass2...>
-output_dir <directory>
|
 製造業向けITソリューション
 品質DX支援 QX digital solution
 建設業務改善ソリューション
 ビル管理業務支援 DK-CONNECT BM
 FILDER SiX TOP
 FILDER SiX 電気 TOP
 Rebro D TOP
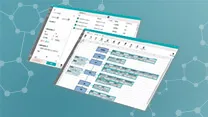 実験記録をデータベース化 ParsleyLab
 マテリアルサイエンス向けソフト Materials Studio
 熱力学物性予測ソフトウェア COSMO
 電子実験ノート
 総合3DCG 制作ソフトウェア Maya
 総合3DCG 制作ソフトウェア 3ds Max
 3Dキャラクタアニメーション制作ソフトウェア MotionBuilder
 モーションキャプチャーシステム Xsens MVN